Tuesday, 20 August 2013

My Pinterest Home - Foyer Table


I've never seen a house with so many odd angles until we moved into our Leduc home, there is a 'zig' here and a 'zag' there ... it was time to turn to Pinterest and scour through pins for ideas to fill the space and yet still have it function for our family.

For Anderson's 1st Birthday we were practical and purchased carseats, kitchen safety items and the 'Summer Infant Sure & Secure Custom Fit Gate'. This left quite a bit of space for a designated foyer - and here's the best part - It's tucked away from little hands!

Here is the official 'Before' photo:

The ottomans match two of our living room chairs, however there isn't enough room for Anderson if they are actually in the living room, the table was originally purchased as an end table for the Guest Room, but has since housed the 'Basket O' Junk' where Dan throws the contents of his pockets daily. The large box is the new table I just picked up from Ikea!

I finally decided on a large sofa table (Ikea Malm Occasional Table $99), and a beautiful display of the family photos we had taken earlier this month with Sydney May Photography. Thanks to Kijiji I came across an ad for reclaimed barn windows, the man was very helpful and had several to choose from, I was able to pick one up Sunday afternoon ($60), all in one trip to the city!

Once we arrived home, Anderson went down for a nap and it was time to get down to business! It didn't take long to assemble the table, and give the window a good wipe down. Then I was just left to add in my photos I printed off at Walmart and dress it with items we already had around the house. I did purchase the large red canister from Ikea's Socker collection, it was a 2pc set with the matching narrow canister on our mantle, the large canister is perfect for housing my Scentsy wax bars!

After:

.. As you can see I've already started the transition to autumn, crisp cold air in the morning, beautiful sunshine the smell of cinnamon and cloves .... Mmmmmm.


Saturday, 1 June 2013

Freezer Cooking - Muffin Pot Pies (Chicken)

Now that our life has settled down I have found more time to spend in our gorgeous new kitchen,  stocking our freezer with Breakfast Burritos and Mini Banana Loaves. Dan is enjoying every minute of my efforts as it puts a hot meal on the table every night, as well as provides a variety of items to get through his 12hr day.

We all know how easy it is to grow tired of the same sandwiches in our lunch and many of us branch out to try toppings such as avocado, sprouts or maybe an exotic cheese! Unfortunately Dan does not have the palette for anything other than meat and potatoes  so I was left turning to Pinterest for something hearty and portable.

Lunch

Muffin Pot Pies (Chicken) - Yields 10 Pot Pies
Ingredients:
4 strips Italian Cooked Chicken, chopped
1c. Mixed Veggies, Frozen
1pkg Grands Biscuits
1can Cream of Chicken Soup
1c. Cheddar Cheese, Grated


1. Mix chicken, veggies, soup and cheese in a bowl.

2. Separate biscuits and place in greased muffin tin, press dough as far up sides as possible without tearing and scoop in filling until level with dough.
   
                        Be sure to fill the empty tins with water for even cooking. 

3. Bake at 350 for 14 minutes, the cheese will be overflowing with ooey-goodness. Remove from oven.


4. To crisp up the outside biscuit dough, remove muffins from tin and place on parchment lined cookie sheet. Bake at 350 for another 10 minutes.


I had a little helper for this task- Anderson sure has grown since my last post!


Saturday, 25 May 2013

Where'd you go?

Starting a blog seemed like a manageable task in the beginning. However, our family decided to make a few changes to turn things upside down for awhile...

At the end of October 2012 when Anderson was just 3 months old, Dan left for work here in Alberta. The opportunities that are available here are unmatched in BC we decided that after winter was over Anderson and I would pack up and move out to Alberta as well to start our new family live and be able to provide more opportunities to our children both present and future.

Single parenthood is not for the faint-hearted, through those 6 months Dan was away Anderson rolled over, sat up, started eating, and learned to crawl. He also,cut 2 teeth, had his first cold, experienced his first night terror, received two rounds of immunizations, had many sleepless nights and boy can he throw a temper tantrum! 

...but we made it, many thanks to FaceTime. It is now May, the stressful move is over, 90% of the boxes are unpacked and put away; Anderson wakes up to his mommy every morning (and we chill all day) and sees Daddy everyday after work and that's the ultimate dream - at least it's ours. 


Saturday, 29 September 2012

Why Should I Freezer Cook?

I'm sure some of you are skeptical as to how freezer cooking could make your life easier, after all it is quite an effort all at once, true - but only until your freezer is stocked, then as things run low you can gradually build them back up, maybe this weekend its Breakfast Burritos and next weekend its Shepard's Pie.

Last night was a particularly trying night in our house, Dan had to work an extra shift to make up for taking a night off next week, and Anderson has just entered into teething. After a play date with Chelsea & Nixon, Anderson protested nap time for the next 6 hours which would've made it impossible for me to make something to eat, let alone something delicious. This is where freezer cooking comes to save the day, I turned the oven to 325 and threw in a Macaroni & Cheese Bake. One hour later and I pulled this beauty from the oven:

It definitely isn't high on the list of healthy foods so I decided to have a salad as well, which I also had prepared in the fridge, just had to pour in some dressing, give it a shake and I had a fresh garden salad; we also buy garlic bread in slices that are already prepared, I pulled two from the freezer when I preheated the oven and popped them in when I was letting the dish cool down. 

Voila, delicious dinner, minimal effort and no dishes! Anderson also fell asleep just in time for me to enjoy this while still warm!
Mmmmm....dinner!

Freezer Cooking Tips:
1. Cook all your meats together: If you're going to need 4lbs of bacon chopped and cooked for 3 different recipes, cook it all together and separate after. You can even refrigerate for a day or two if you get busy and need a break.
2. Buy pre-grated cheese. I hate grating cheese, might be the fact that I pay to have my nail kept pretty and every time I use a grater I seem to mess them up! Also, when you're going to need 1000grams of grated cheese save yourself 10minutes and buy the grated option, I purchase mine at Costco (2packs of 500g for $15 - which is the best deal I've found - Walmart packs are smaller).
3. Split it Up! Don't try to tackle everything in one day, as you can tell by my date stamps I split mine up over two weeks and spent a total of 3 hours at a time in the kitchen, including prep and clean up so I didn't wear myself out. If you have a full day to dedicate when someone can watch the kiddos and get them what they need then that's perfect too - just do what is right for your household.

Friday, 28 September 2012

Freezer Cooking - Hamburger Casserole

We've all made Hamburger Helper at least a few times, great for those busy days - unless you forgot to thaw your hamburger...or don't happen to have 2c. of Milk on hand (that's what I'm always missing). This recipe is Hamburger Helper but easier...yes I said easier; it is also cheaper and delicious!!!

Dinner

Hamburger Casserole - Yields 8 x 2LB Dishes @ $2.25/dish 

Ingredients:
900grams Uncooked Macaroni Pasta (Do  not substitute whole wheat pasta, it's not the same)
2.5lbs Lean Ground Beef
2.5tbsp Taco Seasoning
500g Grated Cheese (I used a Mozza/Cheddar mix; I probably would've added more cheese if I had it - or even doubled the amount) 


Directions:
1. Boil pasta until its about 90% cooked; drain and rinse with cool water, split pasta between two bowls and set aside.

2. Brown beef, season with taco seasoning to your liking, drain. (To maximize efficiency I cooked the meat for this recipe with the meat for the Beef & Cheese Burritos and then divided after cooked. Less dishes and less time).

3. Add seasoned meat to pasta (split between the two bowls) and mix well.

4. Add cheese to pasta (split between the two bowls) and mix well.

5. Divide between dishes (I ran out of 2LB dishes and had to use a couple large ones)..

6. Label and place in freezer.
 To Reheat: Remove lid, place on baking sheet. Cook at 325 for 30-45min.
*I took mine out at 37min, but if you added more cheese you'll want to cook for closer to 45min to let it all melt.

Monday, 24 September 2012

Freezer Cooking - Banana Loaf Minis

Everyone has their own recipe for Banana Bread but I thought I would share my own anyways; I made it into smaller 'mini-loaves' so they are portable in lunches or just on the go - they could even be breakfast!

Snack

Banana Loaf Minis - Yields 18 loaves
Ingredients:
4c. Flour
2c. Sugar
2tsp. Baking Powder
2tsp. Salt
1tsp. Baking Soda
6 Bananas
4 Eggs
2c. Chocolate Chips

1. Mash bananas, and mix in all ingredients except Chocolate Chips.

2. If using stand mixer, remove from stand and mix in Chocolate Chips by hand.

3. Grease and flour pans, I use mini-loaf pans, fill 3/4 with batter.

 4. Bake at 350 for 25-30minutes (mine took 28). Makes 2 pans of 9, bake separately. 

5. Remove from oven and place on racks until cool to the touch.

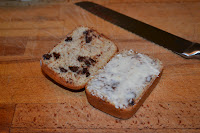
6. Cut in half and butter one side of loaf.

7. Individually wrap with saran-warp and place in large ziploc bags. 
I did not include reheat instructions on these as I will mainly be using them for Dan's lunches and will just take one out in the morning and it will thaw by the evening when he has his break (he works afternoon/evenings and has lunch at 9PM). But here they are:

To Reheat: Thaw, microwave for 30 seconds.


Freezer Cooking - Crockpot BBQ Chicken

As we transition from summer into fall it is time to break out the slow cookers! There is nothing better than starting dinner in the morning and to smell it cooking all day long with minimal effort! It also allows us to get out and enjoy the beautiful changing leaves and crisp air. Here is a recipe that you can pre-assemble and freeze until the morning you want to cook it - 8 hours later and all you have to prepare is rice and it is ready to serve!

Dinner

Crockpot BBQ Chicken - Yields 2 Bagged Meals @ $7.70/bag
(Each bag can feed a family of 4 when served over rice)
Original Source
Ingredients:
4 Sweet Potatoes
1 Medium Red Onion
2 Green Bell Peppers
1 Red Bell Pepper
1 Can Pineapple Slices
4 Chicken Breasts
2 Cans of Tomato Paste (5.5oz)
2tbsp Worcestershire Sauce
4tbsp Brown Sugar
4 Cloves Garlic

Directions:
1. Cut all veggies into large chunks, they will soften in the crockpot and keeping them large will avoid them turning to mush. Be sure to peel your sweet potatoes first.
2. Split the veggies into two large ziploc freezer bags.

3. Into each bag, place one jar of Tomato Pasta, 1tbsp Worcestershire Sauce, 2tbsp Brown Sugar, half of the can of Pineapple (with juice) and 2 cloves of Garlic. 

4. Place two chicken breasts in each bag, I buy my chicken frozen so thawing it to cut into pieces then re-freezing without cooking is a huge NO-NO. I placed my chicken breasts in the bags frozen and immediately re-froze. If you purchased fresh chicken you can cut into cubes before placing in bags to avoid shredding it after the dish has been cooked.

5. Label and place in freezer.
To Cook: Remove from ziploc bag and place right into crockpot (while frozen), add 3/4c liquid - either chicken broth or water and cook on low for 8hrs.

The liquids froze right to the bag so I had to cut it out.

It cooked beautifully but the veggies did get quite soft so be sure to keep your chunks big or it will just all mush together. I found the seasonings a little bland, so I ended up adding in 1tbsp of Chinese Five Spice, I have no idea what spices are in it but it's delicious and packs a little kick. Would also be good with some hot sauce. Here is a picture of the finished dish over rice.